How to install JHYBAMBOO Synthetic thatch palm?
How to install JHYBAMBOO Synthetic thatch palm?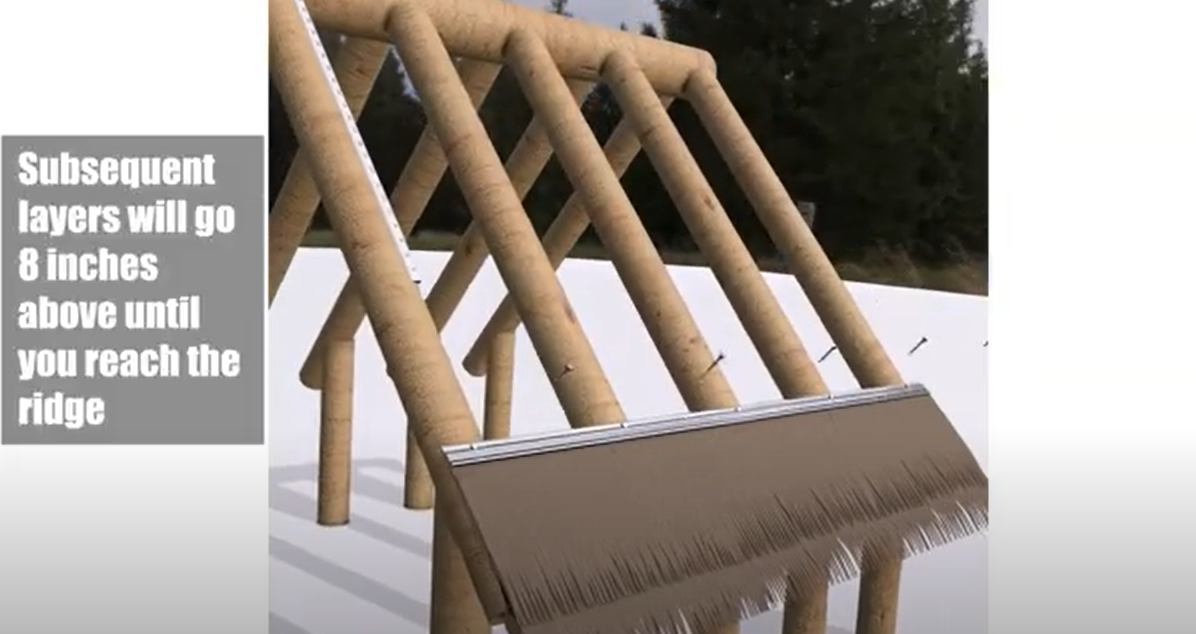
JHYBAMBOO artificial thatch roof is the perfect solution for almost all roofing needs, with high heat insulation, weather resistance, fire resistance, insect resistance and long service life. Whether done through a commercial installation or a DIY project, the installation process is simple and straightforward.
This article describes the installation process, including all the materials and tools you need, as well as the expected results of the JHYBAMBOO artificial thatch system. This guide will be based on an open wood structure as a roof frame, representing the most common scenario for installing artificial thatch. Fortunately, it's not all work and no play. We believe that after learning more about artificial thatch installation methods, you can get the peace and comfort of your investment faster.
Materials and tools required
Installation materials and tools you may need:
Roofing nails (common coils; Stainless steel; 1.25 ")
Nail gun
Heat gun
Knife/utility knife/razor
Work gloves
The ladder can reach a height of at least 2 feet from the top of the roof frame.
Optional: Roof screws (stainless steel; 1.25 ") and an electric drill
JHYBAMBOO thatch system components
The JHYBAMBOO synthetic thatch system consists of two parts:
The field shingles
Ridge tile
1. Floor/roof base
Make sure there is no debris, litter or impurities on the deck and roof base. If the base and frame are not cleaned properly, the shingles may not adhere effectively, which can have other effects that may affect the effectiveness of the roof.
2. Unpack onsite tiles
Unpack the JHYBAMBOO faux thatch shingles and loosen the rough edges to make it look the most natural. Brushing the brim back and forth over a clean surface is an effective way to loosen the edges of thatch shingles.
3. Fold flat edges
Fold the flat edge of each thatch over the joint. It should be folded under or over the underside of the tile.
4. Identify nail targets
There are nail grooves on the flat sides of the thatch roof. Each field tile has six of these nail grooves, which are used to drive nails into the wood frame below.
5. Align the thatch with the frame
Place the first thatch shingle on the roof frame, starting with the second purlin at the bottom. Make sure the shingles cover the entire length of the bottommost purlin. Drive the shingles into place, using nail indentations as a guide.
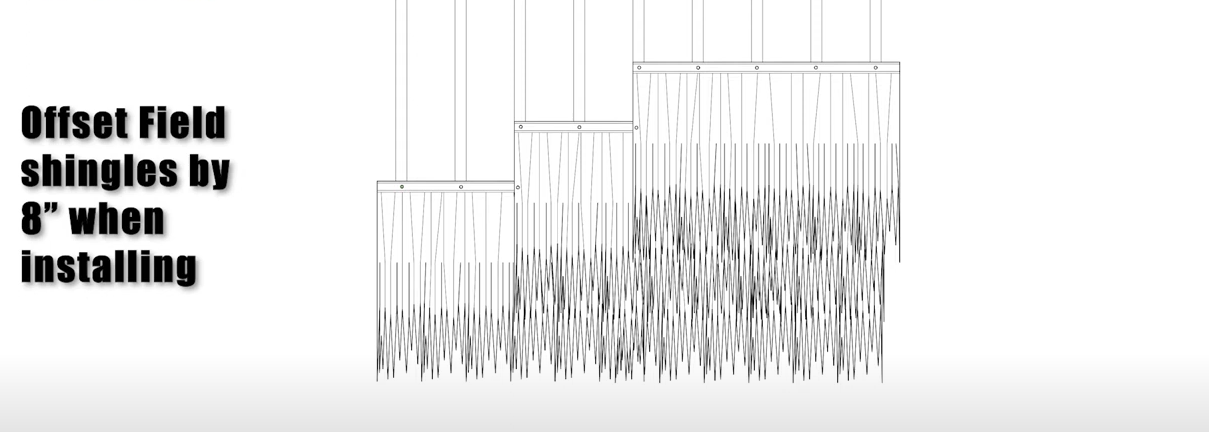
Add more shingles horizontally, with each subsequent shingle overlapping the previous shingle by at least two inches.
When one row of tiles is finished, lay another row about 6 inches below it. The seams of the second row of tiles should be staggered from the previous layer, and the alignment of each tile should be slightly different to add a more natural look.
The position (vertical) of the last row of thatch tiles is exactly the same as the first row, with misaligned seams. There should be three rows in total, with the middle tile sandwiched between the others. Don't forget to have 2 inches of overlap between adjacent tiles!
Complete the first section by cutting off any length of shingles beyond the sides of the frame but leaving the bottom edge portion of the thatched shingles.
6. Complete the first line
Follow Step 5 above to continue placing the first row of thatch tiles on all 4 sides of the roof frame.
7. Next purlin
After completing the first row (along the four sides but not along the corners), proceed to lay the next purlin upwards (vertically). This row of purlins and each subsequent row will be a simple single row of shingles, rather than the three layers described in steps 5 and 6. Nail each field shingle into place along its respective purlin, using the nail mark as a guide, but the leftmost nail of each shingle should be driven into the purlin of the previous layer in the next row. Depending on the shape and slope of the frame, cut off about 8 inches of excess at each end of each row. A 3-inch cut on the center line usually gives the best results.
After installing a row of thatch shingles on the topmost purlins, nail a final layer on the top purlins, but in the middle of the shingles so that the top will hang over the purlins. Simply cut off the flat part of the top of the shingle hanging above the purlin and the result should be a seamless transition that does not expose the flat part of the shingle.
Repeat the same procedure on each of the four sides of the roof frame. If chamfering occurs, simply fold a piece of shingle at the transition and cut the flat edge to match the shape of the frame purlin.
8. Install roof tiles
The successful installation of the quadripole requires some skill. A four-slope tile should be installed vertically at each corner of each row. Place a quad shingle under the field shingles on both sides and add additional quad shingles to maintain the optimal shape and volume of the thatch roof. Low-pitched roofs may require fewer quad shingles, while steeply pitched roofs require additional quad shingles to maintain the volume of the bottom row corners.
Nail the shingles into the frame. Starting with the bottom row of tiles, nail vertically into the four corners.
9. Gable ends
About 6 inches should be left on shingles that reach the edge of the gable. This edge wraps under the main beam of the roof frame and is nailed into place. Cut the edges to the right length and treat the shingles closest to the top of the frame so that the edges of the shingles hang over any exposed frame.
10. Roof tile
Starting at the gable end of the ridge, place and nail ridge thatch tiles along the top of the ridge. A new ridge tile should be placed approximately every 8 inches along the ridge.
11. Finishing the corner of the mountain
Make sure every corner, especially the gables, have enough surrounding shingles to cover them and look solid and natural. Sometimes it can be helpful to use a heat gun to help you adjust the layout of the various shingles and their edges - corners tend to be away from the roof, but a heat gun can help them relax.
Enjoy the newly designed thatched roof
Now that you've been able to install the new artificial thatch roof, all that's left is to enjoy the fruits of your investment! The JHYBAMBOO artificial thatch roof has all the traditional charm and insulation of natural thatch and combines it with modern science, longevity and durability. If you want to watch the installation process,
Please watch our tutorial video, or if you still have questions, contact the professionals at JHYBAMBOO today!
